
Dubsado Setup Checklist for Designers
There's no denying that Dubsado comes with ‘a bit’ of a learning curve.
Take a look at this email I received from a newsletter subscriber:
I just got your other email about Dubsado, and I'm laughing because, oh gosh... I thought it should be an easy peasy thing to do. I was thinking, how difficult can it be!!?? Well, a week ago, I signed up, and gosh, it's complicated. Even if Dubsado themselves send emails and guides, I don't even know where to start. Or maybe I know, but what's so confusing when you should put everything together is that I don't know what to put together... I'm not familiar with all their features, so I don't know if I'm missing something. My progress is zero. Or below zero as I thought I could do it, and realize I can't... (But I do admire my own confidence, though...ha).
This was quite similar to my experience. While I am a coach and systems strategist now, I'm a self-taught designer. I used to run a design studio and I have been exactly where you are. I thought I would be able to figure the Dubsado setup out myself (that’s my default mode - I am smart enough so I should be able right? But I also like to know exactly how something works). So I signed up for an account and tried to build my workflow. It was such an unstructured setup process, it took countless hours (well, weeks actually) and I was overwhelmed, frustrated, and stressed.
Looking back, I had no step-by-step process to follow, I did not go through the resources Dubsado provides, I did not even understand what all of the features were for and I had not mapped out my processes well enough.
The result? Ineffective workflows, on-the-fly emails, and a struggle to provide the exceptional client experience I aspired to.
After that initial setup, there were countless times when I would go in and patch up a section (I had already spent so much time on my setup so I did not want to start again) but it never quite worked the way I wanted it to. It wasn't until I recognized the need to start from scratch outside of Dubsado that I achieved the setup I wanted. I rebuilt my entire client experience from the ground up.
To ensure you avoid the same pitfalls, you need a clear Dubsado Setup Checklist. That's why in this blog post, we'll break down the setup process into 8 manageable steps:
Map out your processes
Translate your processes into Dubsado workflows
Create your Dubsado assets
Set up the Brand settings + Account settings in Dubsado
Additional Dubsado settings you need to set up
Update the standard Dubsado Canned Emails
Build your workflow templates in Dubsado
Build and test your Dubsado workflows

1. Map out your processes
The first step is to map out your processes. Below, I'll outline 6 steps to guide you through this process:
1. List your client process steps: Jot down every step involved in delivering your most common package or service, starting from initial client contact to feedback at the project's end. Cover each phase, regardless of how routine it seems.
2. Include small steps: Pay attention to the small tasks done without much thought. These could be critical yet easily overlooked aspects of your client process.
3. Note potential changes: As you go through the list, jot down any ideas or changes that come to mind. These could be improvements, adjustments, or things you'd like to streamline.
4. Reflect on what your clients love about your process. Think about the elements they mention in their feedback. Is it the extra email updates or the helpful video walkthroughs? Jot down these valuable insights and consider how you can incorporate more of what they love.
5. Identify any struggles you've encountered in past projects. Did you face situations where you lacked a specific email template for unexpected client requests or experienced timeline issues due to unprepared clients? Take note of these challenges so we can address them together.
6. Keep the list handy: Keep this list on your desk while working on client projects. As you go about your work, add to the list when you come across additional steps or nuances in your process.
Below are a couple of articles I wrote about streamlining workflows that can help you with this step.
It's crucial to have this clarity about your processes before you start to integrate them into Dubsado. From my experience in Dubsado set ups for clients across different industries, I've seen firsthand how many setup struggles stem directly from this preparation phase.
The thing is; Dubsado won’t magically streamline your processes for you. It's easy to fall into the trap of thinking that adopting a tool like Dubsado will solve all our process-related challenges. But in reality, success with Dubsado begins outside of Dubsado. It's not a standalone solution that works independently of the systems and structures you have in place. Instead, think of Dubsado as a powerful tool that enhances and automates the processes you've already built.
So if the processes were not there, to begin with, and you tried to take everything that was in your head and add it to Dubsado (while you probably did not go through all the resources Dubsado provides to streamline the setup), you’re just setting yourself up to fail.
Because this is so common I wrote a blog post about the 3 most common underlying reasons why Dubsado is so hard to set up.
2. Translate your processes into Dubsado workflows
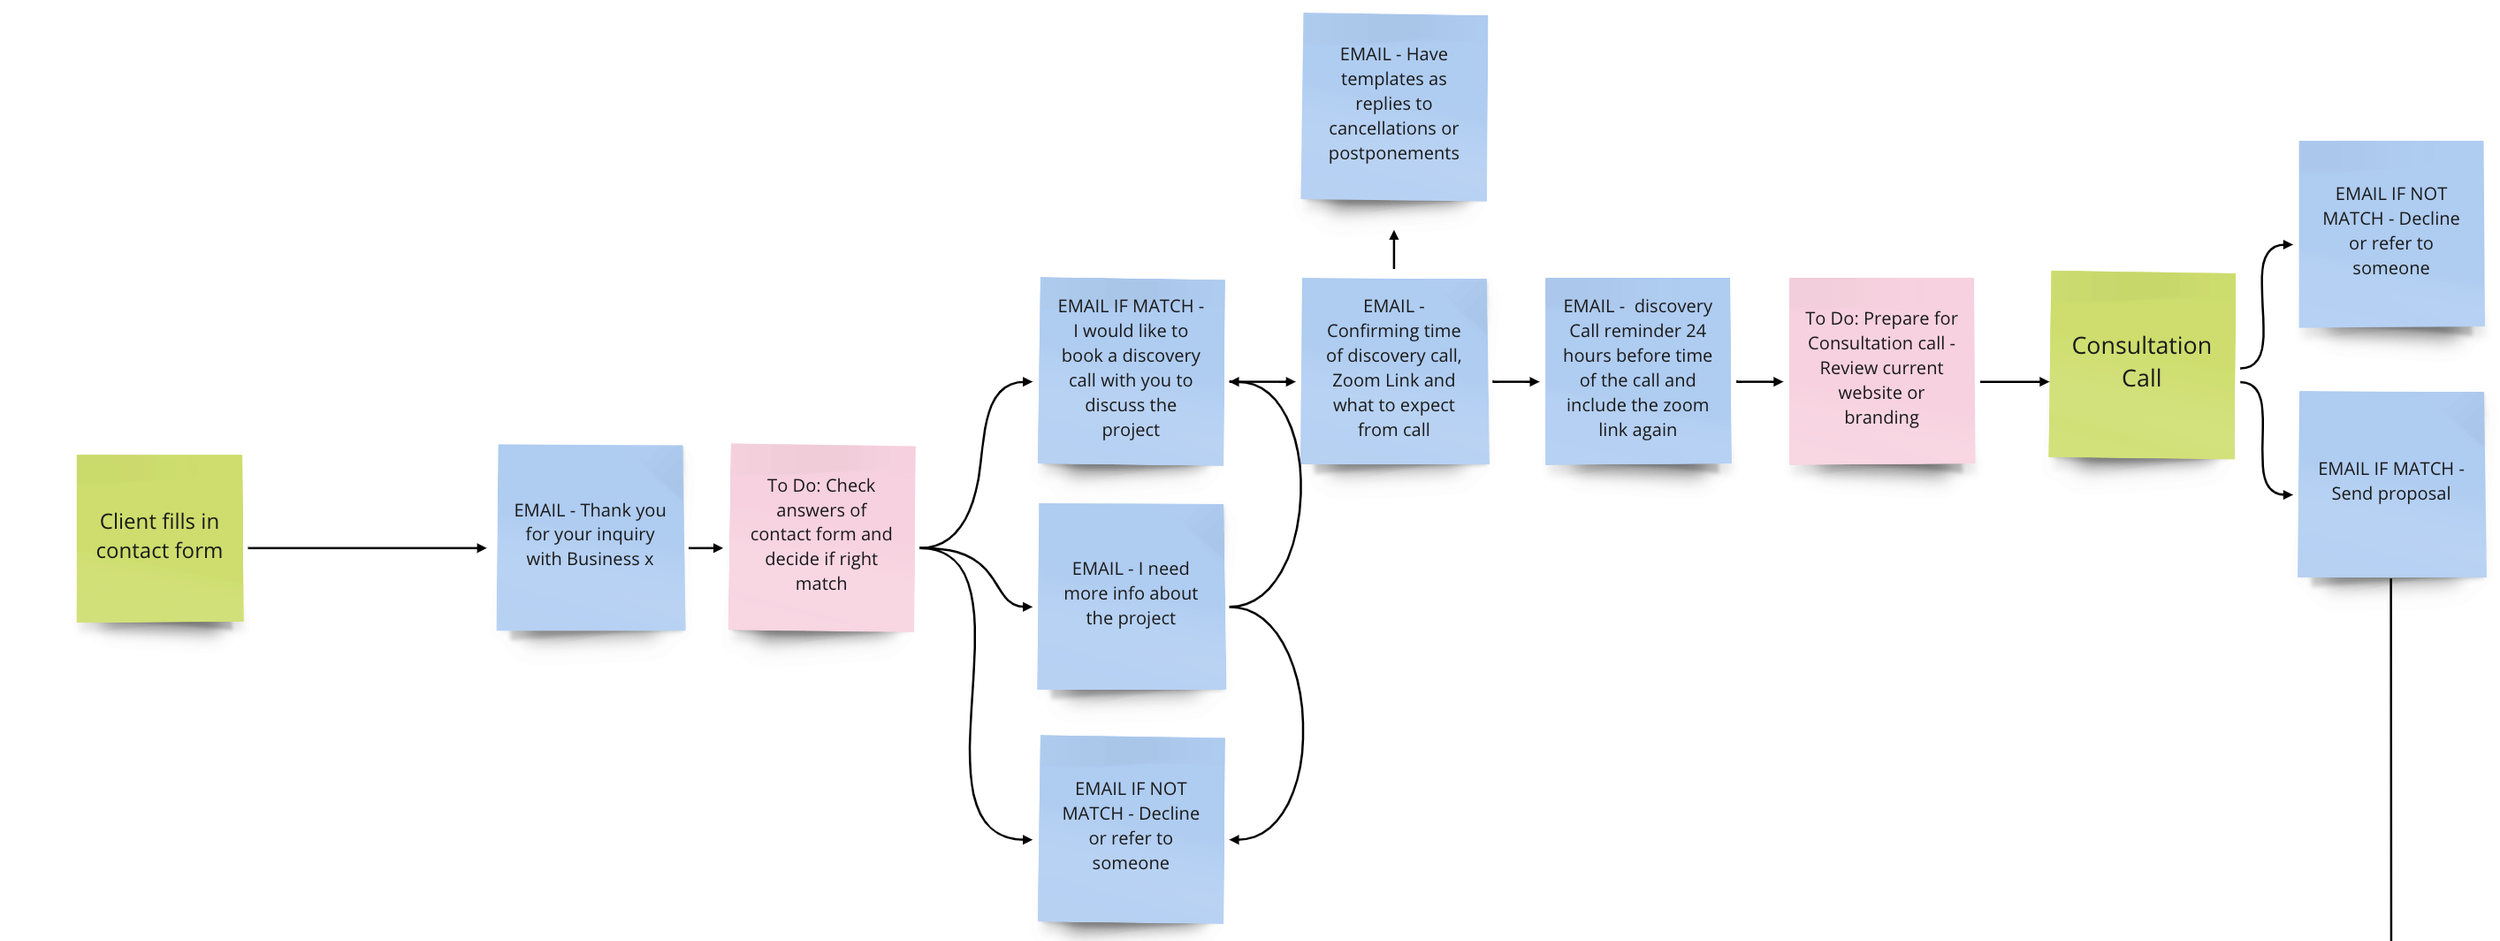
Mapping out your process is one thing, but turning it into a fully functioning Dubsado workflow is a different game altogether. That's why I like to call the next step "translating your processes into Dubsado workflows." Why? Because before you can start building your workflows, you need to delve into the nitty-gritty of each step in your process.
Every step in a workflow has an action. Examples of actions are: Change Project Status, Send Email, Send Form or Send Appointment Scheduler
Every step in a workflow has a trigger. Examples of triggers are: After workflow started, After form is completed, After contract signed by client, After an appointment has ended or After form is not completed.
This means that for every step in your process, you need to determine what needs to happen (action) and when (trigger). You'll also need to define the timing in terms of hours, days, weeks, or years, or if it needs to occur on a fixed date and time. Additionally, you need to decide whether the action requires manual approval by you (Approve an action is available on Send Email, Send Form, Send Contract, Send Primary Invoice Create Invoice, Send Appointment Scheduler)

My advice: when you build a workflow for the first time, set every step to approve so that you can make sure everything is set up correctly. Once you have tested the workflow several times with clients you can take the approval off the steps that don't need any change or update.
Side note: The option to require approval becomes invaluable when you want to wait for client feedback before progressing, such as after a consultation call to decide whether to send a proposal. It's also handy when you want to make alterations to actions or personalise emails before they are sent out. Despite the term "automations," you can still personalise your communication. Certainly, incorporating personal touches may demand a bit more of your time, as you need to add personalised details and then approve each step.
But it does not stop there.
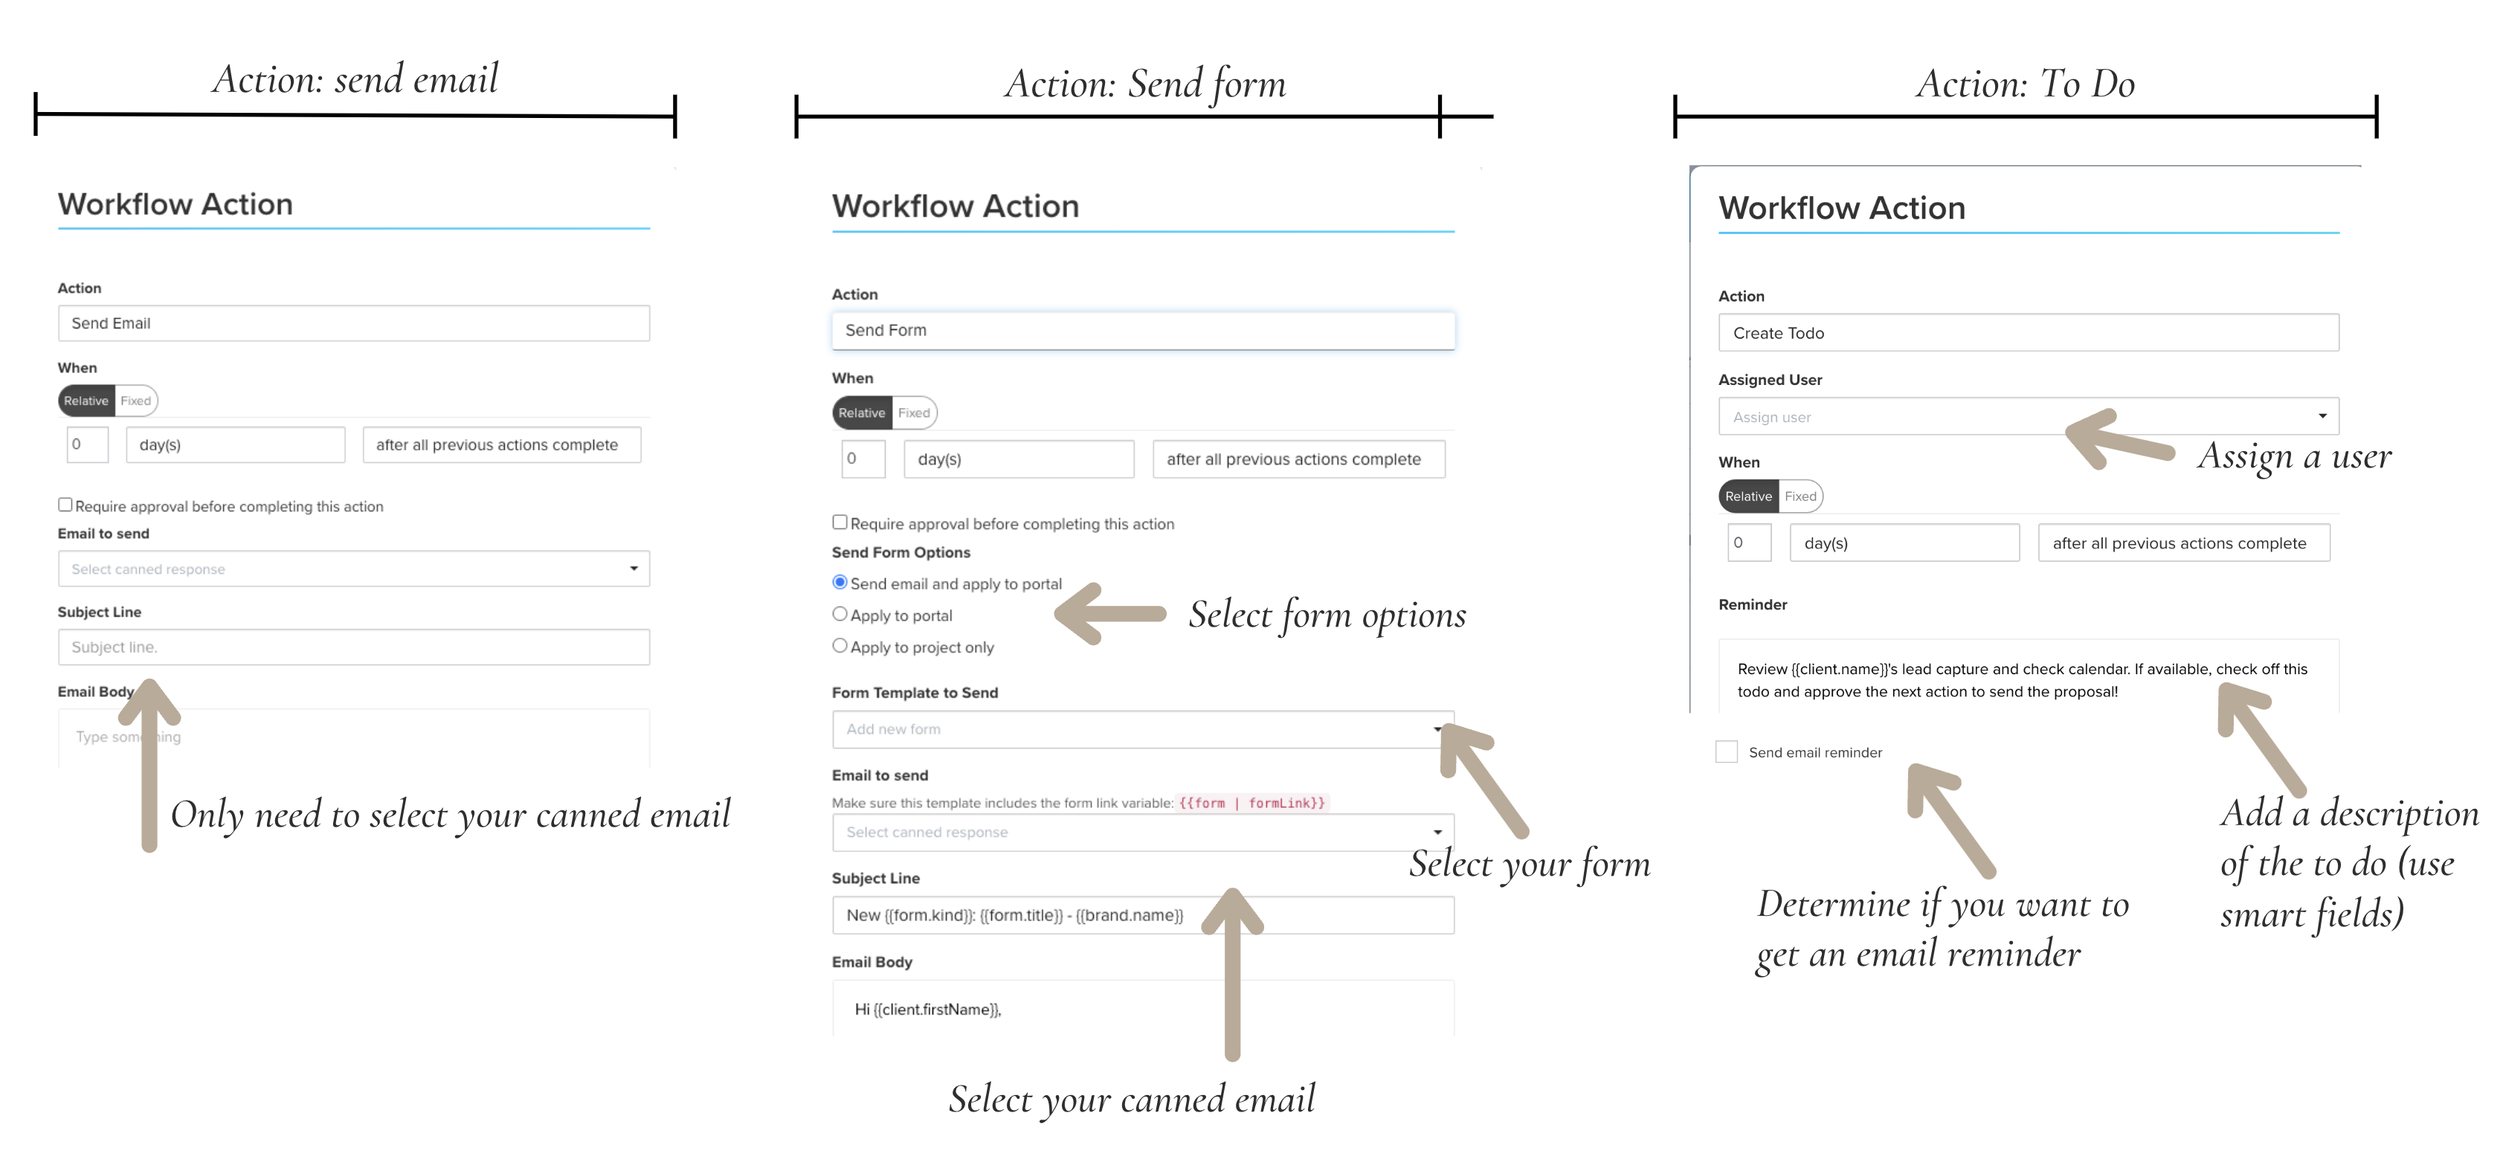
Workflow options vary depending on the action and trigger combination. Some actions only require an email, while others need a form along with the email or involve assigning a user and crafting a to-do message.
To be able to utilise all possible actions in your Dubsado workflow, you need to have set up or created the following: Lead + Job statuses, Tags, Custom fields, Assets outside of Dubsado like PDFs, All emails, Contracts + Sub Agreements, Proposals, Lead Captures, Questionnaires, Payment plans, and Schedulers + Confirmation emails
Without this groundwork, you'll find yourself caught in a never-ending loop:
Adding an action to the workflow.
Realising you forgot to create the form.
Navigating to templates to craft the form.
Return to the workflow to integrate the form.
Noticing the missing corresponding email.
Head to canned emails to draft the missing piece.
Return to the workflow to add the email.
I hope this gives you an insight into which kind of details you need to know that you generally don’t think about when mapping out your processes. That’s why it’s so important to translate each step in your process before you start your Dubsado set up.
An added benefit of this translation process is that it will create a list of all project statuses, proposals, schedulers, emails, contracts, sub-agreements, questionnaires, etc., that need to be built. This will be incredibly helpful in step 7, providing a clear checklist to work from. It will also serve as a guideline when finally putting your workflow together, but more on that below.

3. Create your Dubsado assets
Just like you want to make sure you have all your emails, forms and schedulers ready to go you also want to make sure that you’ve uploaded all imagery that you need into Dubsado.
What kind of images do you need?
Favicon Image (16 x 16 pixels - JPG or PNG)
Domain preview Image (1200 x 630 pixels - JPG - Max 5MB - The main image that appears when sharing a link to certain social sites)
Circle or square image of you to create your mail signature
If you want to use the client portal within Dubsado you can choose to create a desktop portal banner (1800 x 200 pixels or 2700 x 300 for larger screens) and a Mobile portal banner (700 x 400 pixels)
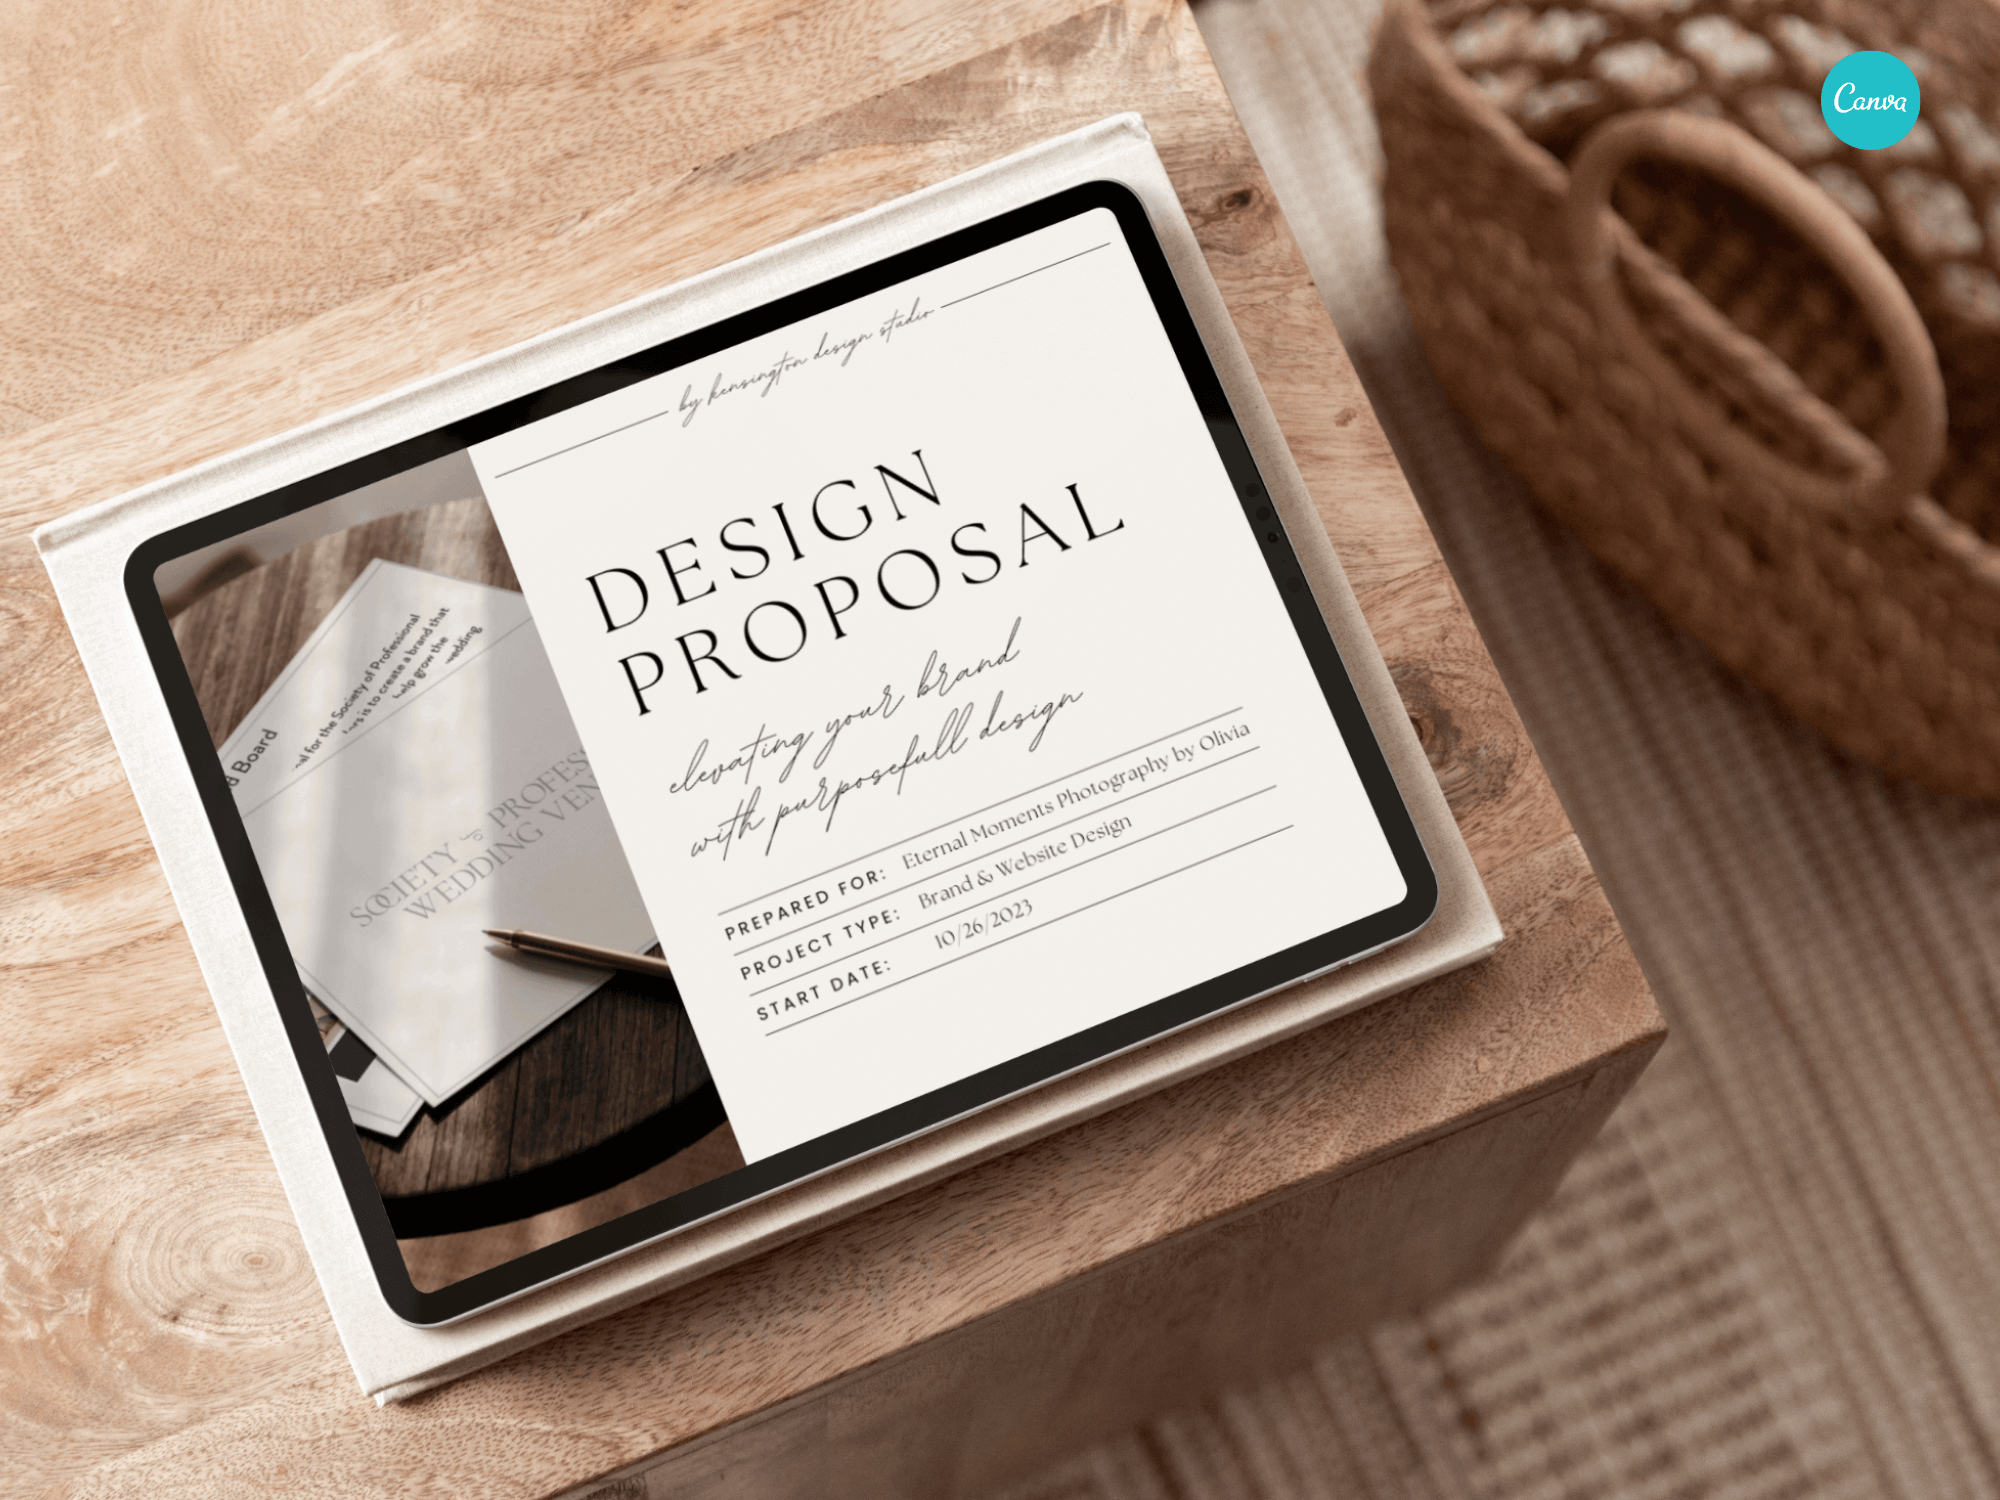
Brand photography or mockup to use in proposals, welcome guides etc.
4. Dubsado Account Setup (your brand and account settings)
I get it, diving into Dubsado and not setting up your workflows right away can feel frustrating. But before your workflows can function smoothly, you'll need to tackle your brand settings. This involves essential steps like connecting your payment processor and email provider.
Below, I've outlined all the different sections that require setup. For detailed instructions on setting up each of these sections, check out How to start setting up your Dubsado account as a designer.
Brand Settings
Branding
Dashboard
Portal
Multi-user
International settings
Receive money
Emails
Integrations
Domain names
Custom-mapped fields
General settings
Account Settings
Login settings
Billing
Notifications
Affiliate dashboard

5. Additional Dubsado settings you need to set up
I've brought up most of these settings before when discussing the translation of your processes, but I want to ensure you have a clear Dubsado setup checklist.
Here are all the other settings you need to configure before diving into building your workflows:
Office Hours
Project Sources
Project Statuses
Project Tags
Custom-mapped fields for clients and project
Income & Expense Categories
Packages & Discounts
Payment plans
6. Update the standard Dubsado Canned Emails
In Dubsado, you'll encounter two types of canned emails. First, there are the standard canned emails already provided in your Dubsado account, linked to actions like contract completion. Then, there are the ones you'll add yourself, not automatically tied to an action unless you include them in a workflow.
Here, I'm focusing on the first type of email. It's vital to review these templates to ensure they meet your needs, as some cannot be replaced.
What do I mean by "replaced"? The standard canned emails are automatically sent to your clients. For example, when a client signs a contract, an email is automatically sent to them with a link to the contract for reference. You can't substitute this email with one you've created.
However, others can be replaced with your own emails, but only within workflows or schedulers (like "Appointment Confirmed").
That's why it's important to check these emails carefully. Some may have limited wording or lack a branded signature.

7. Build your workflow templates in Dubsado
This is a brief step in the Dubsado Setup Checklist, but it's where you'll invest most of your time: creating templates and crafting emails.
Ensure you're building all of the following:
Schedulers + Scheduler Groups
Contracts
Sub-Agreements
Questionnaires
Proposals
Lead Captures
Canned Emails (all other emails you need outside of the default email templates Dubsado created for you)
What you need to build into your Dubsado—such as which contracts and proposals—depends on the processes you've mapped out and translated in steps 2 and 3.
8. Build and test your Dubsado workflows
Now that everything's set up in your Dubsado, it's time to create your workflows. I like to call this step "assembly" because you're essentially using the processes you've mapped out and translated in steps 2 and 3 to guide you through each workflow step. There's no need to brainstorm actions, triggers, or emails; if you've done your translation process correctly, you simply have to select the right ones.
Which workflows you need to build into your Dubsado depends on the processes you've mapped, but here are a few common ones:
Inquiry workflow with lead capture form (Contact form on website)
Inquiry workflow kicked off by an appointment (Combination of a scheduler and lead capture form)
Onboarding workflow for all services or per service (manually triggered or through workflow automation after consultation call)
Service Delivery for each of your services (manually triggered or through workflow automation after an invoice is paid)
Offboarding for all services or per service (manually triggered or through workflow automation after an invoice is paid)
Once you've built the workflows, it's time to test them. It's always wise to run through the process to ensure everything is working smoothly. As the business owner, it's crucial to review the incoming emails and ensure they meet your standards. But it's equally important to consider how the client experiences it. That’s why I like to test workflows using 2 email addresses - 1 for you as the business owner (this one is already connected to Dubsado) and 1 for you as the client (added to the client profile you’re using to test). You can use the sample project that was already created for you in Dubsado.
No matter how many times I've done this or built the same workflows, I always make it a point to test them thoroughly. Each time, I end up tweaking at least one thing based on my testing.
One thing to note: Dubsado recognises when you are signed in as the account owner. this means that not all features like submit buttons are visible to you. To test your forms and workflows either log out of Dubsado, use a different device, or use an incognito window
If you're finding these steps helpful but could use more guidance for your Dubsado systems setup, I've got just the thing for you. I've developed a comprehensive Dubsado step-by-step setup guide that goes hand in hand with this blog post. It covers all the steps we've discussed here but dives even deeper with additional resources like links to the Dubsado help centre and a handy tool to assist you with the translation process

If you thought this post you might also like:


LOOKING FOR ANYTHING?
Popular items in the shop


FOLLOW ON INSTAGRAM


FAVOURITE RESOURCES