
Dubsado for Designers: How to onboard clients
Client onboarding simply refers to the steps you take to guide someone from expressing interest in your design packages to officially becoming a client.
The good news is, you're already handling these steps.
The not-so-good news?
You might not be doing it as efficiently as possible. That could mean more work for you and a less-than-consistent experience for your client.
The goal of onboarding is to make a strong first impression while ensuring a smooth and seamless client journey. It's not just about ticking off formalities; it's a strategic step to set the tone for the entire client experience.
The most apparent benefit of a streamlined onboarding process and utilising automated workflows in Dubsado is how it impacts you.
When you have an automated (automated might not be as automated as you might think and there is still more than enough possibility to personalise your client communication) process in place, it saves you a ton of time (and headache).
Automated workflows in Dubsado can be a game-changer for you. Here's how it benefits you:
No need to repeatedly type out the same emails for each new client.
Smooth onboarding even when you're swamped with work and too busy to check your email.
No need for multiple back-and-forth emails just to schedule a consultation call.
There's no risk of "forgetting" to send that essential email, proposal, contract, or invoice.
Your mind is free to concentrate on crafting exceptional designs.
While these benefits are crucial for your business, there's one even more significant – the elevated experience you provide to each new client.
From the 10+ years that I worked in the hospitality industry, I discovered time and time again that happy clients spend more money and become brand ambassadors for your business.
Viewing the onboarding process through your clients' eyes allows you to achieve your goals. However, if you only approach onboarding from the perspective of saving time and scaling, you might lose sight of what's truly best for your clients.
And in the end, it's your clients that pay the bills and if they're not happy, they won't return or recommend you to others. So let's look at how you can onboard your clients with Dubsado.
And if you’re not yet that familiar with what Dubsado is or how it can help your design studio be sure to first read my article about What is the difference between Dubsado and ClickUp. This also includes a few practical examples of task management and project management in Dubsado.

How your onboarding workflow changes your client experience
Providing top-notch customer service is a breeze when you're just starting out. With a handful of clients, it's manageable to stay on top of every call or email, ensuring you meet your clients' needs.
However, as your business grows, keeping up becomes more challenging.
➝A quick response might unintentionally sound less friendly than you meant.
➝ Missing an email for days could mean losing a potential client to another designer.
➝ Difficulty in tracking client needs leads to unnecessary back-and-forths, wasted time, and frustrated clients.
The benefits of a solid onboarding process for your clients:
It's easy for them. No one likes to go through a complicated process that's full of so many steps they can't keep it straight.
They know what to expect. While your clients aren't going to see the hidden workflow that you have established, they are going to see the benefit that it provides for them.
It's fast. Time is of the essence in onboarding. The longer it takes, the higher the chance of losing a client.
Studies reveal that the most significant opportunity to create loyal customers occurs at the start of your business relationship. If loyalty isn't established within the first 90 days of collaboration, the likelihood diminishes to just 10%.
And on top of that, typically the initial transaction that you do with a client is going to be small in significance to their lifetime value if you're able to give them a good experience and keep them coming back for more.
This is why it's critical to create an onboarding process that results in super fans of your design studio.
How to map out your client onboarding process
So, now that you know just how important it is to create a smooth onboarding experience for your clients how do you go about getting started?
The first step is to think through the steps that happen from the moment that a new client reaches out to you to inquire about your services until you are ready to get started on their project.
Grab a notepad and a pen, or use a whiteboard tool like Miro.
List your client process steps: Jot down every step involved in delivering your most common package or service, starting from initial client contact to feedback at the project's end. Cover each phase, regardless of how routine it seems.
Include small steps: Pay attention to the small tasks done without much thought. These could be critical yet easily overlooked aspects of your client process.
Note potential changes: As you go through the list, jot down any ideas or changes that come to mind. These could be improvements, adjustments, or things you'd like to streamline.
Keep the list handy: Keep this list on your desk while working on client projects. As you go about your work, add to the list when you come across additional steps or nuances in your process.
Once you’ve written down each step, you need to evaluate your current process before you can enhance it. You can read more about the next steps in my article on how to streamline your brand or website design client process
Here’s an example of a client onboarding workflow in Dubsado
The italic steps are what Dubsado would handle for you:
Example onboarding workflow for design projects:
The design client completes the contact form
Dubsado automatically sends an email thanking the client for their interest, that you will review their information and will come back to them in 24 hours (it's good to set expectations)
Dubsado creates a task for you to review the form
In Dubsado you use one of the email templates to let the client know you would love to schedule a call with them to get to know them and their project better. The email includes a link to the scheduler in Dubsado so that they can book the call on a date and time that works best
The client books the call
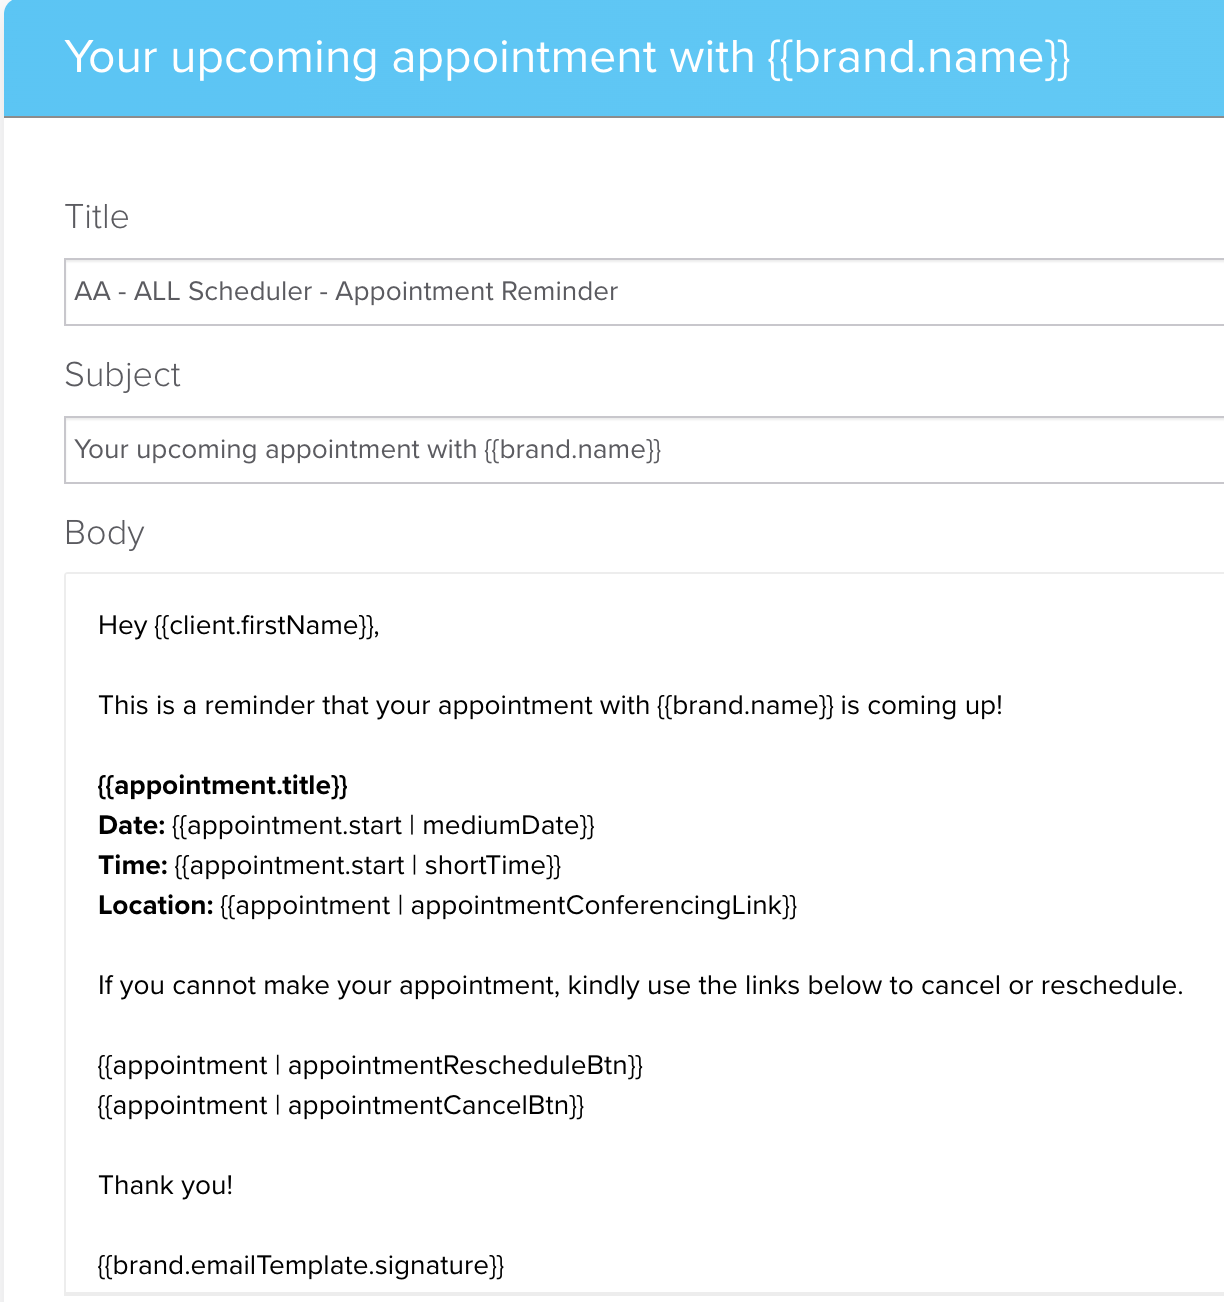
Dubsado sends the client an email to confirm their call and information on how to reschedule or cancel
Dubsado sends the client a reminder email (24 hours before) about the meeting
The initial meeting between you and the client takes place
In Dubsado you use one of the proposal templates to send the client the proposal and connect a contract and invoice
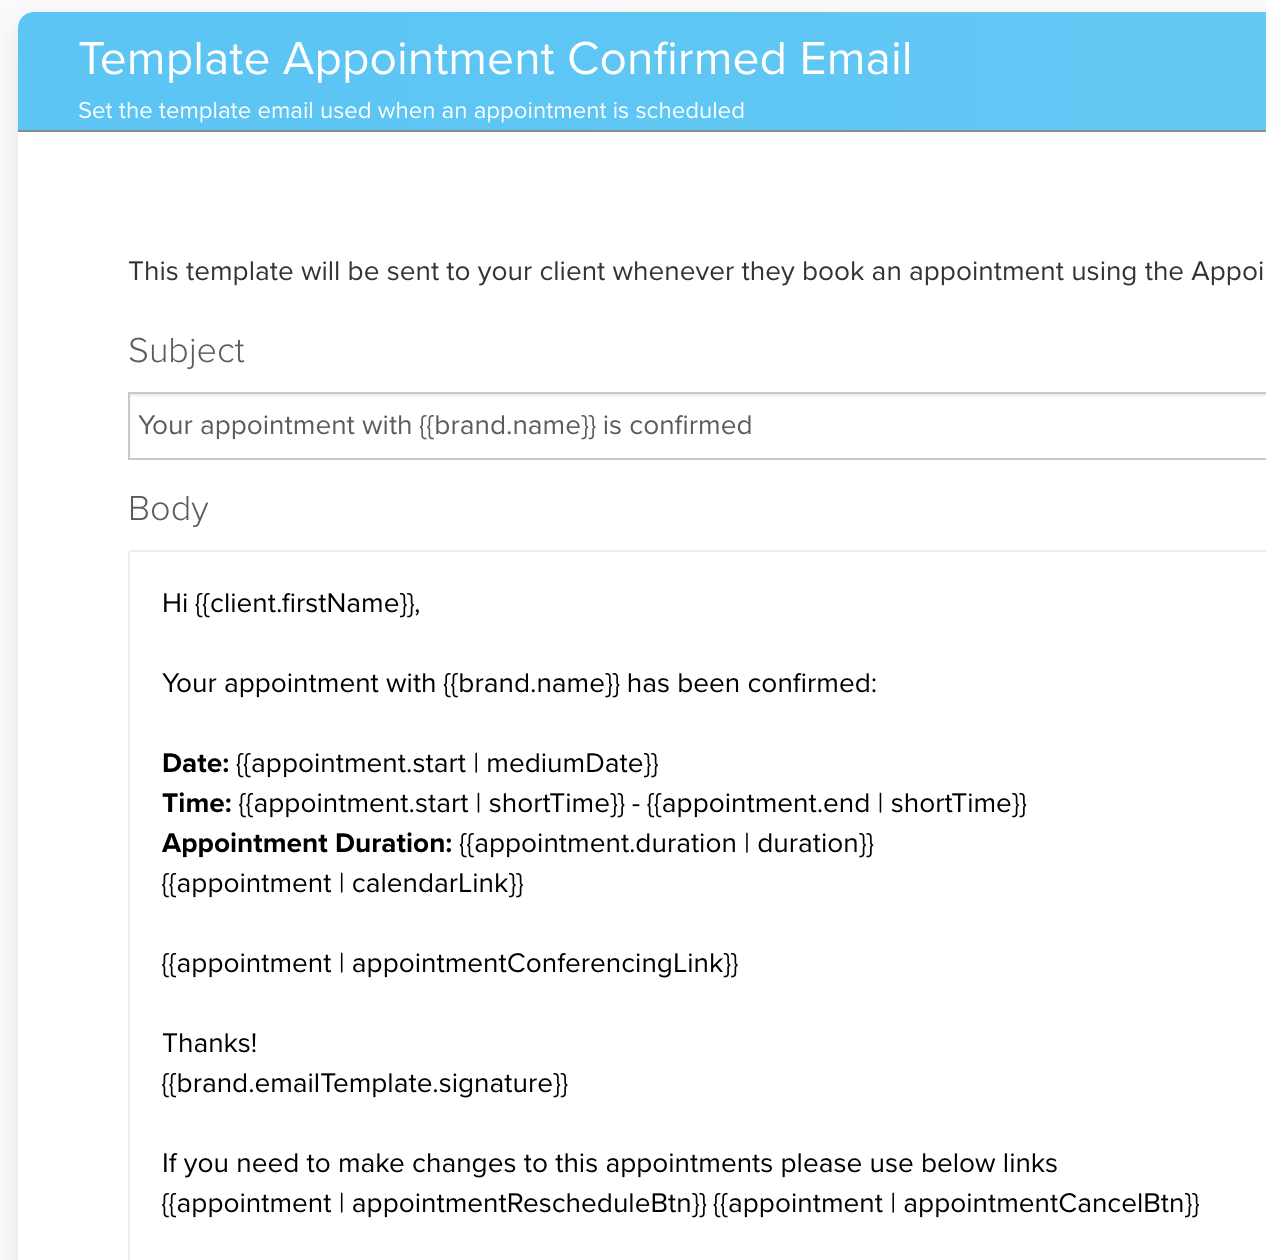
The client accepts the proposal, signs the contract and pays the initial invoice
Dubsado automatically sends a copy of the signed contract to the client
Dubsado automatically sends a welcome email to the client with information for getting started
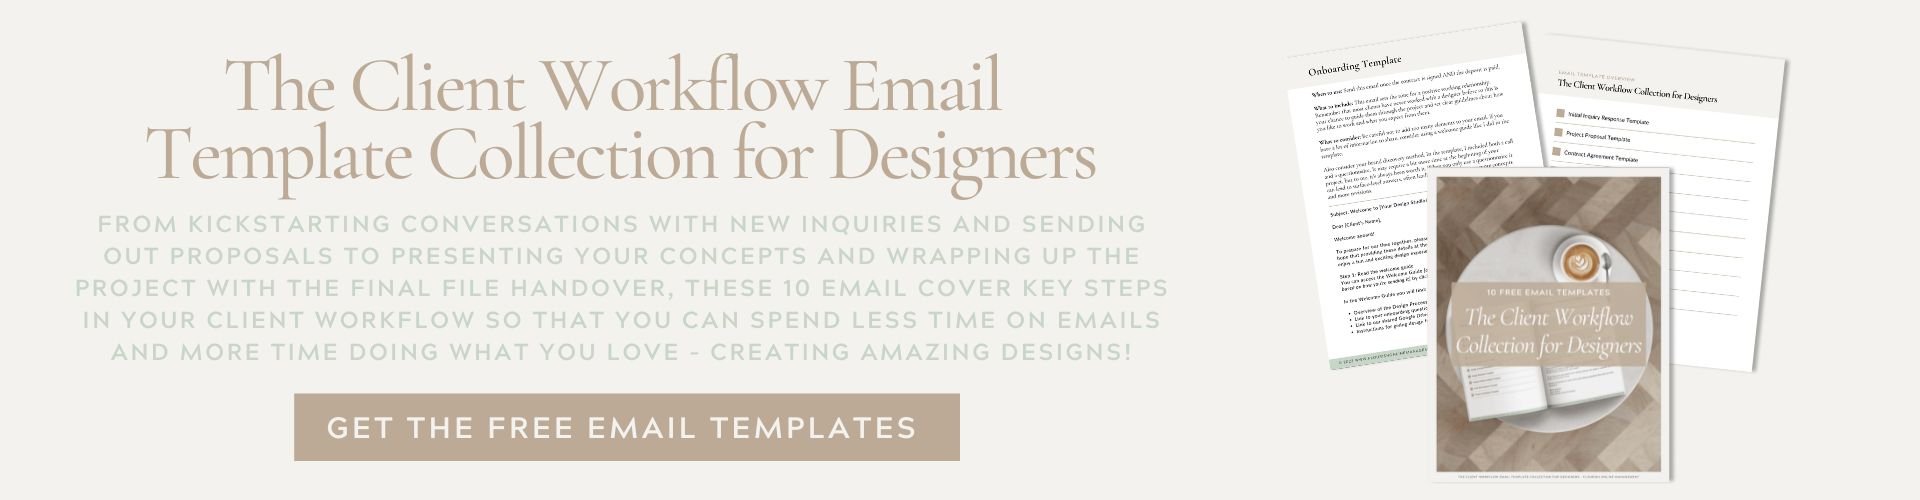
You’ll notice that I’ve mentioned the word email a lot in just this section (6 times, I counted), because well, there are a lot of emails we send to our clients during a design project. But you might find that, even though you send out similar emails regularly, you keep writing them from scratch every time. If so, than it's time to create email templates to help streamline your communication and ensure consistency. Besides that this will save you time, more of your energy can be spent on crafting the best designs. Not sure how to get started with creating your email templates? Enter 40+ email scripts for brand and website designers. A template with more than 40 email scripts from kickstarting conversations with new inquiries and sending out proposals to presenting your concepts and wrapping up the project with the final file handover. So that you can spend less time on emails and more time doing what you love – creating amazing designs!
Now let’s look at the steps of this workflow in more detail


Lead capture form in Dubsado
This phase may vary based on whether you only have a contact form on your website or a scheduler for booking calls, but both can be easily set up in Dubsado.
In this instance, a contact form is utilised for pre-qualifying the client. Alternatively, you can set up a scheduler and incorporate the qualifying questions mentioned below.
If you want to know more about qualifying leads, and how the qualification process starts well before the potential client fills out your form or schedules a call, continue reading How to reach more ideal clients as a designer.
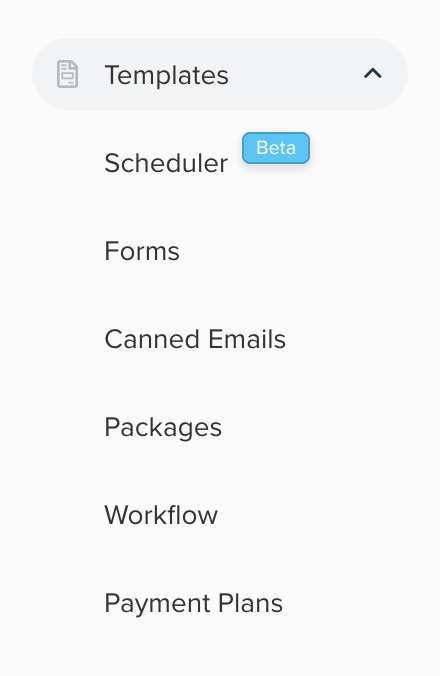
On your website, this form is commonly known as a contact form, but within Dubsado, it is referred to as a lead capture form (Navigate to templates ➝ Forms ➝ Lead Capture).
This form is about gathering crucial information to assess if they truly align with your ideal client profile.
However, there is a fine balance between wanting to qualify potential clients and asking so many questions that it feels too much effort to contact you. So, before changing your contact or consultation form, think about what is essential to know about this potential client.
What is essential will depend on your business, but in general, you can think about the following:
Which specific service are they interested in? This helps you determine if you have availability to take on their project and cater to their needs effectively.
What type of business do they have? Understanding their niche or industry is crucial, especially if you specialise in certain areas. It helps ensure a strong alignment between your expertise and their business.
What is their budget range? Knowing their budget upfront is important, especially if you display as-of pricing on your website. It allows you to assess if their budget aligns with the scope and scale of the work involved.
How long have they been in business? This question helps you gauge their experience level and whether you prefer to work with established business owners or those just starting.


This not only gives you already an idea if this client is a good fit for your brand or website design package but Dubsado uses this information like name and email address (when you use a short answer field and use the field mapping dropdown) to create a client profile. This information can later be use to create the contract and invoice.


But the best part about this is, that if you have a question like 'Which service are you interested in?' you can attach a workflow to each service (when you use the workflow block) that activates when the contact form is submitted.
This is the backend setting in Dubsado needed to complete the second step in the example workflow.
The client completes the contact form
Dubsado automatically sends an email thanking the client for their interest, that you will review their information and will come back to them in 24 hours
As always; make sure you test the form by filling it in and checking if a project is created in Dubsado.


Follow up & booking a consultation call with Dubsado
The next step is the follow-up that covers steps 3 and 4. Dubsado, with its attached workflow to your contact form, generates a task for you to review the submitted form.
A quick note: If you're using a project management system like ClickUp, you can integrate this step using Zapier. However, for the sake of this example, I'm showcasing the possibilities available within Dubsado.
Upon reviewing the answers in the contact form, you assess if this could be an ideal client. If so, the next step is to schedule a call to better understand them and their project.
This leads to step 4:
In Dubsado you use one of the email templates to let the client know you would love to schedule a call with them to get to know them and their project better.
The email includes a link to the scheduler in Dubsado so that they can book the call on a date and time that works best

To proceed with steps 5 to 8 of this workflow example (scheduling a consultation call), you'll need the Dubsado Scheduler.
The client books the call from the link you included in the email
Dubsado sends the client an email to confirm their call and information on how to reschedule or cancel
Dubsado sends the client a reminder email (24 hours before) about the meeting
The initial meeting between you and the client takes place
Setting up the scheduler in Dubsado is essential for sending a link to your clients, enabling them to book a call. While I won't delve into the details here, you can find a step-by-step guide here.
Proposals, Contracts & Invoicing in Dubsado
To execute steps 9 to 11 efficiently, leverage the templates you've created for proposals and contracts, along with the built-in invoicing setup.
In Dubsado you use one of the proposal templates to send the client the proposal and connect a contract and invoice
The client accepts the proposal, signs the contract, and pays the initial invoice
Dubsado automatically sends a copy of the signed contract to the client
When you use Dubsado's lead capture form, it creates a client profile and project for the client. Thanks to the workflow tied to the service they inquired about, there's an action step in the workflow to send the proposal.
Go to the forms tab in the client's project, and you'll find your proposal template, already in place. Begin by using this template and update the text and package based on the project discussed during your consultation call. Not sure what to include in your proposal? I’ve got you covered with this proposal guide. Not feeling like doing it yourself, check out my proposal template in the shop.
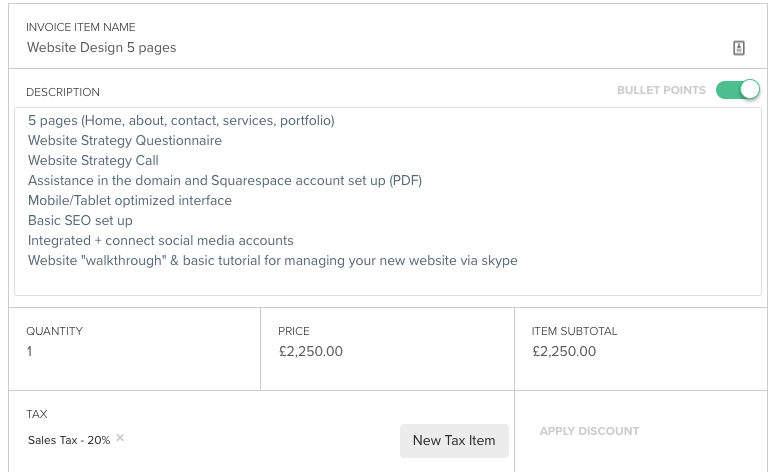
Even though you have package templates, for each client you can edit the package. Go to the section where you have added the package to the proposal. When you click on that section, to the left a menu will open that displays the selected package. Just click edit package and you can make adjustments for your project. This won’t update the original template.

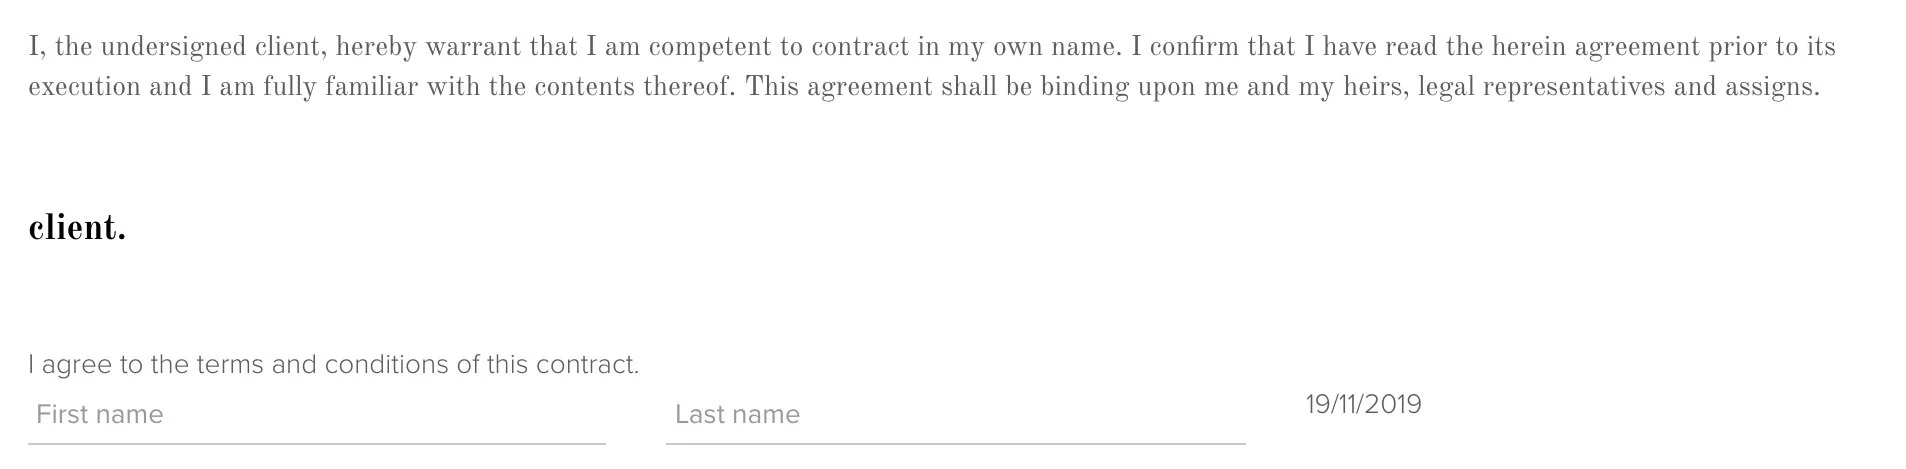
Once updated, attach the contract template to the client's project. A great feature here is the ability for both you and your clients to sign contracts electronically, eliminating the need for external platforms or the cumbersome process of printing, signing, scanning, and sending.
The subsequent step is generating the invoice. Regardless if your proposal offers different design packages for the client to choose from or just one, you have to add the payment plan to the invoice tab.
Upon completing these steps, send the proposal using the email template tailored for this purpose, outlining the necessary actions for the client.
Upon the client's acceptance or selection of packages and add-ons, they will seamlessly progress to the contract (automatically updated with their chosen package). Once the contract is signed, they'll see the initial invoice, including a pay button.
Have a look at the video below where I share a quick tip for integrating Dubsado and Google Drive to automatically create a client folder when a client has signed a contract.
Send a welcome email with Dubsado
The final step in this onboarding process is sending out the welcome email after the contract is signed and the payment is made.
Dubsado automatically sends a welcome email to the client with information for getting started
This email can include the next steps of the process, a link to their client portal, and the design questionnaire they need to fill in.
However, I would advise including a few more elements to set clear expectations about boundaries, timelines, deliverables, responsibilities, and revisions. I am going into more detail about that here or you can grab my Welcome Guide Template for Designers .

If you like the email that I have in the screenshot above, be sure to check out the Email Scripts for Designers as it includes 40+ emails that cover every step in your client process.
Workflows in Dubsado
I already mentioned workflows a couple of times, but as this is the base of your automation it deserves a bit more attention.
A workflow is a predefined list of steps. Once one step is completed it automatically sets the next step in motion. Like steps 2,3 and 6 of the client onboarding workflow.
Dubsado automatically sends an email thanking the client for their interest, that you will review their information and will come back to them in 24 hours (it's good to set expectations)
Dubsado creates a task for you to review the form
Dubsado sends the client an email to confirm their call and information on how to reschedule or cancel
How to translate your client onboarding process into a Dubsado onboarding workflow
Mapping out your process is one thing, but turning it into a fully functioning Dubsado workflow is another ballgame.
Before diving into Dubsado, ensure everything you want in your workflow is already set up in Dubsado. Without this, you'll find yourself going back and forth for every form, email, or scheduler you want to add.
I’ve been there, and it’s very frustrating.
So make sure you have set up or created the following:
Lead + Job statuses, Tags, Custom fields, Assets outside of Dubsado like PDFs, All emails, Contracts + Sub Agreements, Proposals, Lead Captures, Questionnaires, Payment plans, and Schedulers + Confirmation emails
Every step in a workflow has an action.
Examples of actions are: Change Project Status, Send Email, Send Form or Send Appointment Scheduler
Every step in a workflow has a trigger.
Examples of triggers are: After workflow started, After form is completed, After contract signed by client, After an appointment has ended or After form is not completed.
This means that for every step in your onboarding process, you need to determine what needs to happen (action) and when (trigger).
But you’ll also need to define the when in terms of hours, days, weeks, or years or if it needs to happen on a fixed date and time.
Before building your workflow, ensure you've translated every client process step into a Dubsado-ready workflow. For each step, you need the following information:


LOOKING FOR ANYTHING?
popular in the shop


FOLLOW ON INSTAGRAM


favourite
resources
*Below links are affiliate links and I get a small kickback if you use these links to sign up


Besides Action + Trigger + When you always need to define whether the action needs manual approval by you.
Approve an action is available on: Send Email, Send Form, Send Contract, Send Primary Invoice Create Invoice, Send Appointment Scheduler
My advice: when you build a workflow for the first time, set every step to approve so that you can make sure everything is set up correctly. Once you have tested the workflow several times with clients you can take the approval off the steps that don't need any change or update.
The option to require approval becomes invaluable when you want to wait for client feedback before progressing, such as after a consultation call to decide whether to send a proposal.


It's also handy when you want to make alterations to actions or personalise emails before they are sent out. Despite the term "automations," you can still personalise your communication.
Certainly, incorporating personal touches may demand a bit more of your time, as you need to add personalised details and then approve each step.
However, this additional investment pales in comparison to the time saved by using a CRM like Dubsado for your client onboarding process.
You could actually view it differently: Dubsado allows you to invest more time in your designs and client communication.
Every aspect—from the lead capture form to the final invoice—is a crucial touchpoint that contributes to the overall impression you leave.
And when you embrace the power of automated workflows, you're not just saving time but crafting an elevated experience for your clients.
I hope this blog gives you some insights into how using Dubsado:
Removes the need to repeatedly type out the same emails through email templates,
Speeds up your communication and processes with automated confirmations and check-ins,
Eliminates the hassle of scheduling back-and-forth emails for consultation calls, thanks to the client-friendly scheduler,
Mitigates the risk of forgetting to send crucial emails, proposals, contracts, or invoices.
The result? Happy clients who are likely to return or recommend your services to others.
There you have it
There you have it, a step-by-step overview of how you onboard clients with Dubsado. Want to learn more about Dubsado and client workflows? Check out these blogs:
Or take the shortcut with the Step-by-Step Dubsado Setup Guide or the Elevate your client workflow with Dubsado Training which includes 4.5 hours of video recordings from the live workshops held in February 2024, 20 email templates designed specifically for use in Dubsado and the Step-by-Step Dubsado Setup Guide